'Kozhikode' or Calicut (the anglicized name) is a coastal city in the state of Kerala in India, also known as the 'land of spices'. A visit to Calicut is incomplete without enjoying the famous Kozhikodan chicken biryani! There are a couple of popular restaurants like Paragon, Saagar, Bombay Hotel, etc, which serve this extremely delicious meal, and sometimes the wait times at peak hours can be long. It is, however, totally worth the wait!

Jump to:
Why does this recipe work?
- Unlike many spicier versions, Kozhikodan or Malabar Chicken Biryani is subtle yet incredibly flavorful.
- What sets it apart is the delicate balance of yogurt, lemon juice, green chillies, and ginger garlic paste. The aromatic blend of Malabar spices-fennel, anise, cloves, cardamom, cinnamon, nutmeg, and bay leaves is another factor. They all come together to create a dish that's rich, fragrant, and irresistible.
- It's the kind of biryani that makes you go back for second helpings and thirds.
- The star of this biryani is the Jeerakasala (Kaima) rice, a short-grain, fragrant rice variety that's native to Kerala. Its unique aroma and texture elevate the dish, though basmati or other long-grain rice can be used as alternatives.
- The generous garnishes - boiled eggs, deep-fried onions, cashews, raisins, and a sprinkle of fresh mint and coriander leaves add flavor and visual appeal.
- For an authentic Malabar experience, serve it with sweet date chutney, pickles, coconut mint chutney, pappadam, yogurt salad, and if possible, on a banana leaf-because tradition tastes better.
Ingredients used in making the biryani
- Dry Spices - A variety of dry spices like coriander seeds, fennel seeds, cumin, poppy seeds, nutmeg, easy-to-make homemade garam masala (a blend of cloves, cinnamon, cardamom, bay leaf, cumin)
- Freshly ground paste - ginger, garlic, green chilies. Use chilies as tolerated, as the dish mainly gets the spice from them.
- Yogurt that is preferably not too sour
- Fresh herbs - coriander, mint, and curry leaves chopped finely
- Chicken with bone-in is preferable.
- Basmati or Jeerakasala ( Jeeraga Samba or Kaima) Rice
- Ghee and whole spices like cloves, cinnamon, cardamom, bay leaves, nutmeg
- Fried onions, cashews, raisins, and boiled eggs for garnish

How to make the Kozhikodan Chicken Biryani?
This chicken biryani does not use red chili powder; all the spice is from the green chilies and other dry spices. The traditional recipe has an off-white color due to very little turmeric used, but I like to use a little turmeric in my preparation, so you can see the final dish has a yellow tinge.
I also cook the chicken and rice separately and then layer them together. The traditional recipe calls for cooking the rice and chicken in the 'dum'(steaming in a closed container).
The outcome of my dish is very close to the original, and everyone who has had it loves it. I hope you enjoyed reading about this special and popular dish and will try it. Please read on for the ingredients and the detailed cooking procedure.

Steps in making the biryani
The cooking of Kozhikodan Chicken Biryani involves four main steps:
- Chicken Marination
- Chicken Preparation
- Garnishes and Rice Preparation
- Layering biryani and garnishing
Marination and Preparation
We begin by marinating the chicken with a blend of powdered dry spices, yogurt, a ground paste of green chilies, poppy seeds, and aromatic spices, along with fresh lemon juice, chopped coriander, and mint leaves. Let it marinate for 30 minutes, or for an even richer flavor, up to 2-3 hours.
Garnishes and Rice preparation
While the chicken marinates, prepare the garnishes simultaneously by frying onions, nuts, and raisins until golden. For the rice, fry it in ghee with whole spices, then add water and salt to taste, cooking until fully tender.
Layering
Once the chicken is perfectly cooked, begin layering the dish. Start with rice, then add a generous portion of chicken gravy, followed by the fried garnishes. Repeat the layering process, finishing with a final sprinkle of the garnishes for an aromatic and flavorful presentation.

- Step 1: Grind the dry spices fennel, cumin, and coriander seeds to a powder.

- Step 2: Grind ginger, garlic, green chilies, and poppy seeds to paste for the marinade.

- Step 3: Marinate the chicken with the ground spices, ground paste, yogurt, tomatoes, lemon juice, turmeric, biryani, garam masala, chopped coriander leaves, mint, and curry leaves. After marinating for a while, cook the chicken until done.

- Step 4: Fry garnishes, nuts, raisins, and onions in ghee and keep aside.

- Step 5: Fry washed rice in ghee along with whole spices. Add water and salt, and cook until done. Once done, layer in a casserole starting with rice, chicken gravy, and garnishes.

- Step 6: Garnish with chopped coriander and mint leaves, fried onions, nuts, raisins, and boiled egg.

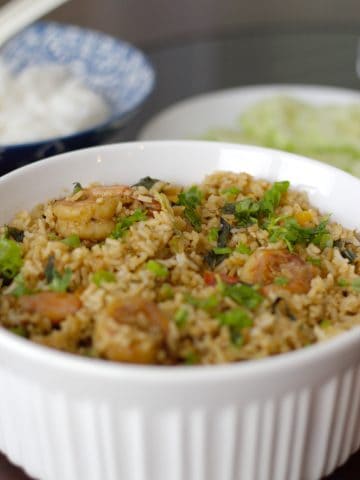
If you love seafood, especially shrimp, I would recommend my Malabar Shrimp Biryani recipe, for which I got great reviews, and the biryani recipe from Malabar, which is similar, Malabar Mutton Biryani with subtle spices and special flavors. There is also another recipe for biryani mutton that is pretty easy to make.

Some accompaniments with the biryani are salad with curd, pickles, and fritters. Fried fish like Pan-fried Tilapia or shrimp dishes like Spicy Shrimp with coconut slices are also loved by many folks.
Frequently Asked Questions
Basmati rice:
For the first cup of rice, add double the amount of water. For each additional cup of rice, add one cup of water.
Jeerakasala or Kaima rice:
For every cup of rice, add 1.5 cups of water, though the exact amount may vary depending on the brand or variety of rice. In an Instant Pot, for 3 cups of Jeerakasala rice, 4 ¾ to 5 cups of water gives the perfect texture.
Be careful not to add too much water, as it can cause the rice to become mushy. On the other hand, too little water will leave the rice undercooked.
Note: The cup referenced here is the "rice cooker cup," which is equivalent to 180 ml, not the standard US cup. Be sure to use this measurement for the correct proportions when cooking.
The earliest time to cook after marination is 30 minutes, but you can also marinate for 1 to 2 hours in the refrigerator so that the chicken will absorb all the spices.
Sure, but ghee gives an authentic taste to this biryani and is preferable; a combination of ghee and vegetable oil will also work.
'Jeerakashala' or 'Jeeraga Samba' rice is commonly available at Indian grocery stores in the US and is a close match to the 'Kaima' rice traditionally used in this recipe. It's a short-grain variety, distinct from the typical long-grain rice.
The fragrant aroma of 'Jeerakashala' rice, when paired with the spices, truly elevates the flavor profile of this biryani, and if you can find this rice variety, I highly recommend using it for an authentic and rich taste that captures the essence of the dish.
The main star ingredient of this dish is the rice used, which is a special 'Jeerakasala' or 'Kaima' rice, and this is a tiny variety of rice that enhances the taste of this dish.
However, I also use the regular Basmati rice, which is easily available in the stores here in the US and tastes equally good and comes close in taste!
If you tried this Kozhikodan Chicken Biryani Recipe or any other recipe on my blog, please leave a 🌟 star rating and a 📝 comment below. I love hearing from you!
Kozhikodan Chicken Biryani
Ingredients
For Biryani Rice
- 6 cups Rice Basmati or Jeerakasala
- 4 tsp Ghee or Clarified Butter
- 4 tsp Oil
- 5-6 Cloves
- 3-4 Cinnamon (small pieces)
- 2 Bay leaves
- 5-6 Cardamoms
- ½ Onion diced
- 2 tsp Salt or to taste
- 5 cups Water
For Chicken Marination
- 1 ½ pounds Chicken cut into pieces
- 3 cups Yogurt
- 1 ½ cups Coriander leaves finely chopped
- 1 cup Mint leaves finely chopped
- 3 medium Tomatoes chopped
- 1 tsp Turmeric powder
- 1 tsp Biryani Masala (optional)
- ½ tsp Garam Masala
- 1 medium Lemon juice
- 1 tsp salt or to taste
To powder for marinade
- 1 ½ tsp cumin seeds
- 2 tbsp coriander seeds
- 1 ½ tsp fennel seeds
To grind for marinade
- 1 inch ginger
- 10-12 cloves garlic
- 10-15 green chillies use as tolerated
- 2 tsp Poppy seeds
For Chicken Preparation
- 4 tbsp ghee or oil
- 3-4 inch cinnamon sticks
- 5-6 cloves
- 4-5 cardamom
- 1 nutmeg
- 1 bay leaf
- 1 tomato medium diced
- 1 tsp ginger garlic paste
For Garnish
- 2 onions cut into long thin stripes
- 10 cashews
- 10 raisins
- 4 tbsp ghee
- 1 sprig mint leaves chopped
- 1 cup coriander leaves chopped
- 4 boiled eggs optional
Instructions
Chicken Marination
- Wash the meat thoroughly with salt and lemon and drain water completely.
- Powder the ingredients in the "to powder for marinade" section .
- Grind the ingredients in the "to grind for marinade" section with minimum water .
- Add the powdered spices, ground paste and all contents in the "for chicken marination" section to the chicken.
- Mix well and marinate for about 2 to 3 hours in a referigrator
Rice Preparation and garnishes
- Wash the rice, drain and keep aside
- Heat a thick bottomed pan , add the ghee and oil
- Add the thin sliced onions and fry until crisp golden brown
- Drain and keep aside.
- Add the cashews and raisins ,brown it as well
- Drain and keep aside.
- The thin fried onions, cashews and raisins will be used for garnishing.
- In the remaining ghee and oil, add the spices under the "For Biryani rice" section
- Next add the diced onions and sautée
- After 2 mins add the washed rice
- Fry for about 5 to 7 mins until the rice turns opaque
- Add the salt and water and cook until done in a rice cooker
- Wait for the steam to be released and rice to be cooled.
Chicken Preparation
- Next for the preparation of the Chicken , pour ghee and oil in a large deep bottomed pan
- Add onions and sautée it for 10 mins
- Add tomatoes and ginger garlic paste ,sautée for another 5 mins
- Cook until the chicken is well done.
- Add some chopped coriander leaves and squeeze a little lemon.
Layering biryani and garnishing
- For layering , transfer the cooked rice into a serving bowl and garnish with fried onions, cashews ,raisins, chopped mint and coriander leaves
- Then add a layer of the chicken gravy and repeat layering with rice, chicken and again layer with garnish onions , nuts ,raisins, mint and coriander leaves.
- Gently mix so the gravy is evenly mixed into the rice.
- Squeeze half a lemon if you like (optional).
- Finally garnish with chopped coriander leaves, boiled egg, and the remaining garnishes.
- Kozhikodan Chicken Biryani is ready to be served.
- Accompaniments that are usually served with this dish are fritters (pappad), yogurt salad, coconut chutney and pickle .
Video
Notes
- Marinate the chicken in the marinade and while marination is in progress start frying garnishes like onions, nuts, and rice and set the rice to cook.
- After marination, cook the chicken, so by the time it is done cooking, you will be ready with the rice and garnishes for layering.
- Use ghee liberally for the authentic taste of the dish, you can also choose to have ghee and a combination of vegetable oil.
- For layering layer a ladle full of rice in a casserole first followed by chicken and gravy, garnishes like onions, nuts, raisins, and a pinch of garam masala can be added. Gently mix and combine well.
- To get crispy brown onions for garnishing, slice them thin and long and add a little salt to cook them faster.


I love a good biryani, and this one looks fantastic
Thanks for the recipe! It’s so delicious!
Love how you have explained the entire process. Thanks
Wow, this looks amazing. I love biryani, going to making it this weekend.
We enjoy this chicken biryani. It's so deep in flavors and comforting as well
This is making my tummy growl!
So flavorful!
I love cinnamon with chicken. This recipe was delicious.
Everything about this biryani sounds delicious. I love how there are so many varieties of biryani according to taste and region.
I've never heard of this before, and I loved it. So homey, warm and delicious.
I love Indian food but have never made Kozhikodan Biryani at home. I can't wait to try this!
looks absolutely delicious! nom nom nom! I would definitely enjoy eating it. I love biryani rice in any form
Thank you so much for the wonderful comments!